I love procedural generation. As a hobbyist game developer, it is the concept and technique that I keep reaching for in my games. This article is about Cellular Automata, which follows suit of my previous articles regarding other procedural generation strategies for game development. In my last article, we studied the Wave Function Collapse Algorithm. Staying within that topical thread of procedural algorithms which can be leveraged in game development, let's turn our focus to Cellular Automata.
What is Cellular Automata
Cellular Automata, or CA for short, is an algorithm which has some key potential benefits within the field of game development. You may have seen in certain games, for example Dwarf Fortress or Terraria for example, where organic looking caves are generated, or some map patterns that look naturally grown. Essentially, it uses a grid based data set, and for each discrete unit in that grid, uses the state of all its neighbors to determine the end state of that cell in the ending simulation result.
History of Cellular Automata
Background
The early beginnings of the algorithm originated in the 1940's while scientists were studying crystal growth. That study, plus others including self-replicating robot experiments led to the realization of using a method of treating a system as a collection of discrete units (cells), and calculating their behavior based on the influence of each cell's neighbors. For more details on this: Cellular Automata
The Game of Life

In the 1970's, James Conway famously created a simulation called the Game of Life. This very simple simulation, which had only four rules, created a very dynamic and varied group of results that bounced between appearing random and controlled order. The rules determined each cell's future state as classified as dying due to underpopulation or overpopulation, creating a new living unit due to reproduction, or just continuing to exist with the correct balance of population around that unit.
Uses in Game Development
There are some common implementations of using Cellular Automata in game development. The classic trope is using the CA algorithm for generating tilemaps of organic looking areas or cave systems.

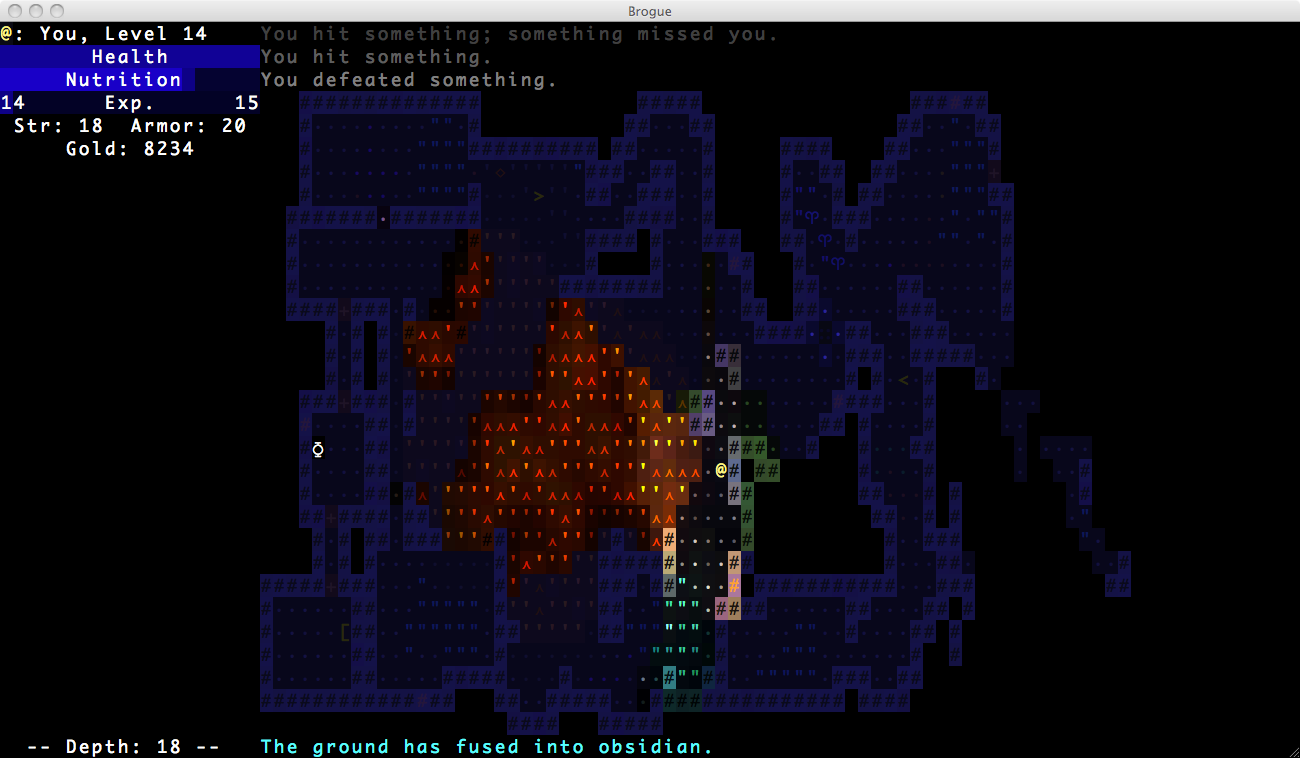
Another application is simulating the spread of fire across an area. Brogue is a good example of how this can be used.

Other aspects is simulating gas expansion in an area, or the spread of a virus, or enemy reproduction simulations for generating new enemies.
The Algorithm
For explaining the CA algorithm, we will demonstrate code snippets that demonstrate TypeScript and using Excalibur.js, but this can be done in any languages and framework of your choice.
Initialization
We start with a grid of tiles that are randomly filled with ones and zeroes.
ts
ts
The algorithm will have us walk through the grid tile by tile and we will either leave the one or zero in place, or we will flip that value to the opposite, meaning a zero will become a one, and vice versa. The results of this assessment needs to be kept in a new or cloned array, as to not overwrite the starting array's values as you iterate over the tiles.
The Rules
The rules around flipping the values in each cell will depend on each implementation of the CA algorithm. These can be variable rules, each implementation can be unique in that instance. This gives you some agency and control over how you want your simulation to run. I've tailored this function with the flexibility to pass in the rules on each iteration. The rules are regarding how to handle out of bounds indexes, and what cutoff points are being used.
ts
ts
To note, this approach to the CA algorithm is for the sake of THIS article. Other approaches can be implemented. Let's define our rules for the scope of this article.
- If the starting value for a tile is a zero, then to flip it to a one, the neighbors must have five or more ones surrounding the starting tile.
- If the starting value for a tile is a one, then to flip it to a zero, the neighbors must have three or fewer ones surrounding the starting tile.
- For tiles on the edges of the grid, which will not have 8 neighbors, out of bound regions will be treated as ones or 'walls'
ts
ts
With these rules in place, which can be modified and tailored to your liking, we can use them to determine the next iteration of the grid by going tile by tile and setting the new grid's values based on each tile's neighbors.
Counting Walls
For the rule on out of bound neighbors, you can use a variety of different rules to your liking. You can treat them as constants, like in this instance, we treat them as walls. You can have them be treated as floors, which will change how your simulation runs, producing a more 'open' result. You can also have the out of bound tiles mirror the value of the starting value, i.e. if your starting tile on the edge is a one, then out of bound tiles are all ones, and vice versa.
ts
ts
So starting at the first tile of the grid, you will look at the eight neighbors of the tile, in this instance, five of them are out of bound indexes. You add all the walls up in the neighbors,since the starting value is a zero, if the value is greater or equal to five, in the new grid/array, you will place a one in index zero for the new grid. This is how you flip the values. If, for instance, there would be less than five walls for the neighbors of this index, the value would have remained zero. You repeat this process for each tile in the grid/array.
Redraw your tiles
At the end, when you have completely iterated over each tile, you will have a new grid of tiles that are now set to zeroes or ones, based on that starting array. You can use this new grid as a completed result, or you can re-run the same simulation using this new grid as your 'new' starting array of data.
ts
ts
Walkthrough of the Algorithm
This walkthrough will simply use an array of numbers. With this array of numbers we will use a noise field, to represent random starting values, and then we will utilize the CA algorithm over multiple steps to highlight how it can be utilized.
Starting Point
Let's start with an empty array of numbers. We will represent the flat array as a two dimensional grid, with x and y coordinates. This is a 7 x 7 grid, which will be an array of forty-nine cells. As we process throught he CA algorithm, we will be recording our results into a new array, as to not overwrite the input array while we are iterating over the indexes.
For the CA algorithm, it is suggested to fill the initial array with random ones and zeroes. You can use a Perlin noise field, or a Simplex noise field or just use your languages built in random function to fill the field. Here is ours:
Now we start the process of looping through each index and either leave them alone of flip the value between 0 and 1 based on the values of the neighbors. For this simulation we treat out of bound indexes as walls.
The first index
The first index of the array is the top left corner of the grid. This is relatively unique in the sense that this index only has three real neighbors. But as we mentioned before, out of bound (OOB) indexes will be treated as walls. If we count up each neighbor index, plus the OOB indexes, we get a value of seven. Since this count is higher than four, we will flip this indexes value to one in the new array we are creating.
Iterating
The second index of the array is a one. Now this index only has three OOB indexes that will count as walls.
This index only has one addition one in its neighbors, and if that's added to the three OOB index values, that puts our value to four. In our algorithm we are using today, the value that is required to change a one to a zero is if it has less than four walls as neighbors. With that, we will leave this one in place and insert this value in the new array.
We will follow this process for each index with the given rules below:
- If the original value is one in the starting index, to be set to zero in the new array, the neighbor values have to be less than four.
- If the original value is zero in the starting index, to be set to one in the new array, the neighbor values need to be five or higher.
Let's speed this process along a bit.
Finishing the first row.
Generating the 2nd row.
Generating the 3rd row.
Generating the 4th row.
Generating the 5th row.
Generating the 6th row.
Generating the Final row.
Now we have a completed array of new values. The thing about the CA algorithm that is favorable is that you can reuse the algorithm again on the new set of values to generate deeper levels of generation on the initial data set.
Let's run the simulation on this new data and see how it turns out.
So you see how numbers start to collect together to create natural, organic looking regions of walls and floors. This is particularly handy technique for generating cave shapes for tilemaps.
Demo Application

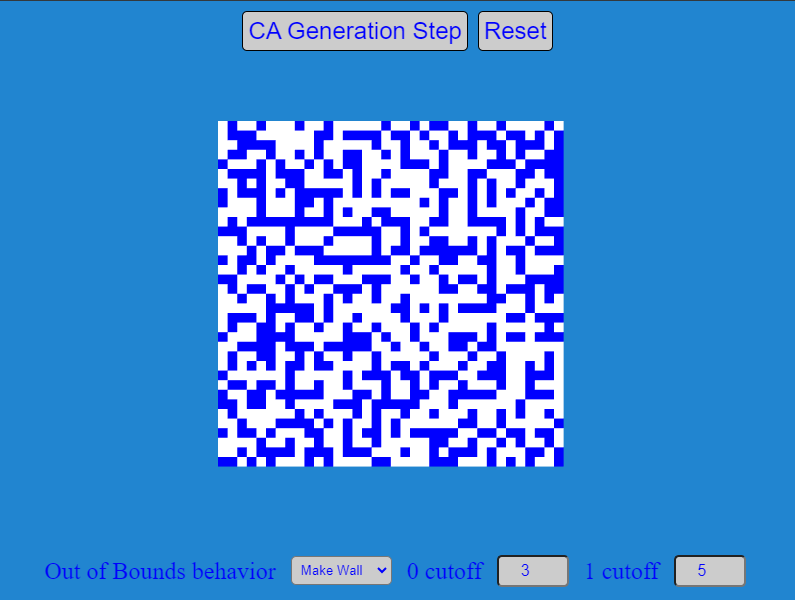
The demo simply consists of a 36x36 tilemap of blue and white tiles. Blue tiles represent the walls, and white tiles represent the floor tiles. There are two buttons, one that resets the simulation, and the other button triggers the CA algorithm and uses the tilemap to demonstrate the results.
Also added to the demo is access to some of the variables that manipulate the simulation. We can now modify the behavior of the OOB indexes. For instance, instead of the default 'walls', you can now change the sim to use random setting, mirror the edge tile, or set it constant to 'wall' or 'floor'.
You also have to ability to see what happens when you unbalance the trigger points. Above we defined 3 and 5 as the trigger points for flipping a tile's state. You have the ability to modify that and see the results it has on the simulation.
The demo starts with a noise field which is a plugin for Excalibur. Using a numbered array representing the 36x36 tilemap, which has ones and zeroes we can feed this array into the CA function. You can repeatedly press the 'CA Generation Step' button and the same array can be re-fed into the algorithm to see the step by step iteration, and then can be reset to a new noise field again to start over.
Why Excalibur

Small Plug...
ExcaliburJS is a friendly, TypeScript 2D game engine that can produce games for the web. It is free and open source (FOSS), well documented, and has a growing, healthy community of gamedevs working with it and supporting each other. There is a great discord channel for it HERE, for questions and inquiries. Check it out!!!
Conclusions
So, what did we cover? We discussed the history of Cellular Automata and some generalized use cases for CA within the context of game development. We covered the implementation of the steps to take to perform the simulation on a grid of data, and then we conducted a walk through example of using the algorithm. Finally, we introduced a demo application hosted on itch, and shared the repository in case one is interested in the implementation of it.
This algorithm is one of the easier to implement, as the steps are not that complicated either in cognitive depth or in mathematical processing. It is one of my favorite simple tools that reach for especially for tilemap generation when I create levels. I urge you to give it a try and see what you can generate for yourself!
